ModernCV is a customisable LaTeX CV template for creating your résumé, with 5 basic themes.
You can edit it directly and for free on Overleaf, and if you’re a beginner this is probably the way to go. There are also many other CV templates available on Overleaf, although personally I find ModernCV the most elegant overall.
But the version on Overleaf is not as customisable as the full source code. So here I’m going to write down how to download, build and customise the original source code on Ubuntu 23.04, as I do it.
Prerequisites
First, install LaTeX on Ubuntu:
sudo apt update
sudo apt install -y latexmk texlive-latex-extra texlive-fonts-extra git
The pages we’re installing are:
- LatexMK: A smart compiler for LaTeX documents. It wraps and makes use of pdflatex. It’s better than using pdflatex yourself because it will manage any recompiltions and further steps automatically.
- texlive-latex-extra: This contains the etoolbox package, which is needed for most things including ModernCV.
- texlive-fonts-extra: This contains fontawesome5, used by ModernCV.
- Git: You need this to clone ModernCV, if you don’t have it.
Build the template ModernCV
Now clone the ModernCV project and build the template CV to check it’s working:
git clone https://github.com/moderncv/moderncv  # Get the code
cd moderncv  # Enter the project
latexmk -pdf ./template.tex  # Build the template
If it succeeded, you should see something like this at the bottom of the output:
Output written on template.pdf (6 pages, 351459 bytes).
Transcript written on template.log.
Latexmk: Getting log file 'template.log'
Latexmk: Examining 'template.fls'
Latexmk: Examining 'template.log'
Latexmk: Found input bbl file 'template.bbl'
Latexmk: Log file says output to 'template.pdf'
Latexmk: Found bibliography file(s):
  ./publications.bib
Latexmk: All targets () are up-to-date
And if you open up template.pdf you should now see an example CV for “John Doe”.
If you get errors in compiling the PDF, firstly try running it again, or try deleting the directory, cloning it again, and then running if again. If that fails, try copying any error messages into Google to see if you can discover if you can fix the error by installing more texlive packages. It’s possible installing textlive-full may help.
Customise the CV
To customise the CV for your own purposes, you should first copy template.tex to make your own .tex file for your CV, and then open that file and start editing it.
cp template.tex yourname.tex  # Make a copy
code yourname.tex  # I like to use VSCode for editing, but you do you
The first thing you should probably do is go down to where it says “John Doe” and change it to your name:
\name{John}{Doe}
Once you’ve made a couple of changes, try building and opening your CV:
latexmk -pdf ./yourname.tex
xdg-open yourname.pdf
To compile your CV again, you’ll need to delete the old PDF first:
rm yourname.pdf
latexmk -pdf ./yourname.tex
Customising
If you’re happy with the theme, you can simply make changes to the pieces of content, move them around to suit your information, and you’re done. But if you want to make deeper changes, that’s also possible.
The file has liberal comments to explain to you how to make changes to it.
\documentclass[11pt,a4paper,sans]{moderncv}        % possible options include font size ('10pt', '11pt' and '12pt'), paper size ('a4paper', 'letterpaper', 'a5paper', 'legalpaper', 'executivepaper' and 'landscape') and font family ('sans' and 'roman')

% moderncv themes
\moderncvstyle{classic}                            % style options are 'casual' (default), 'classic', 'banking', 'oldstyle' and 'fancy'
\moderncvcolor{blue}                               % color options 'black', 'blue' (default), 'burgundy', 'green', 'grey', 'orange', 'purple' and 'red'
%\renewcommand{\familydefault}{\sfdefault}         % to set the default font; use '\sfdefault' for the default sans serif font, '\rmdefault' for the default roman one, or any tex font name
%\nopagenumbers{}                                  % uncomment to suppress automatic page numbering for CVs longer than one page

% adjust the page margins
\usepackage[scale=0.75]{geometry}
\setlength{\footskip}{149.60005pt}                 % depending on the amount of information in the footer, you need to change this value. comment this line out and set it to the size given in the warning
%\setlength{\hintscolumnwidth}{3cm}                % if you want to change the width of the column with the dates
%\setlength{\makecvheadnamewidth}{10cm}            % for the 'classic' style, if you want to force the width allocated to your name and avoid line breaks. be careful though, the length is normally calculated to avoid any overlap with your personal info; use this at your own typographical risks...
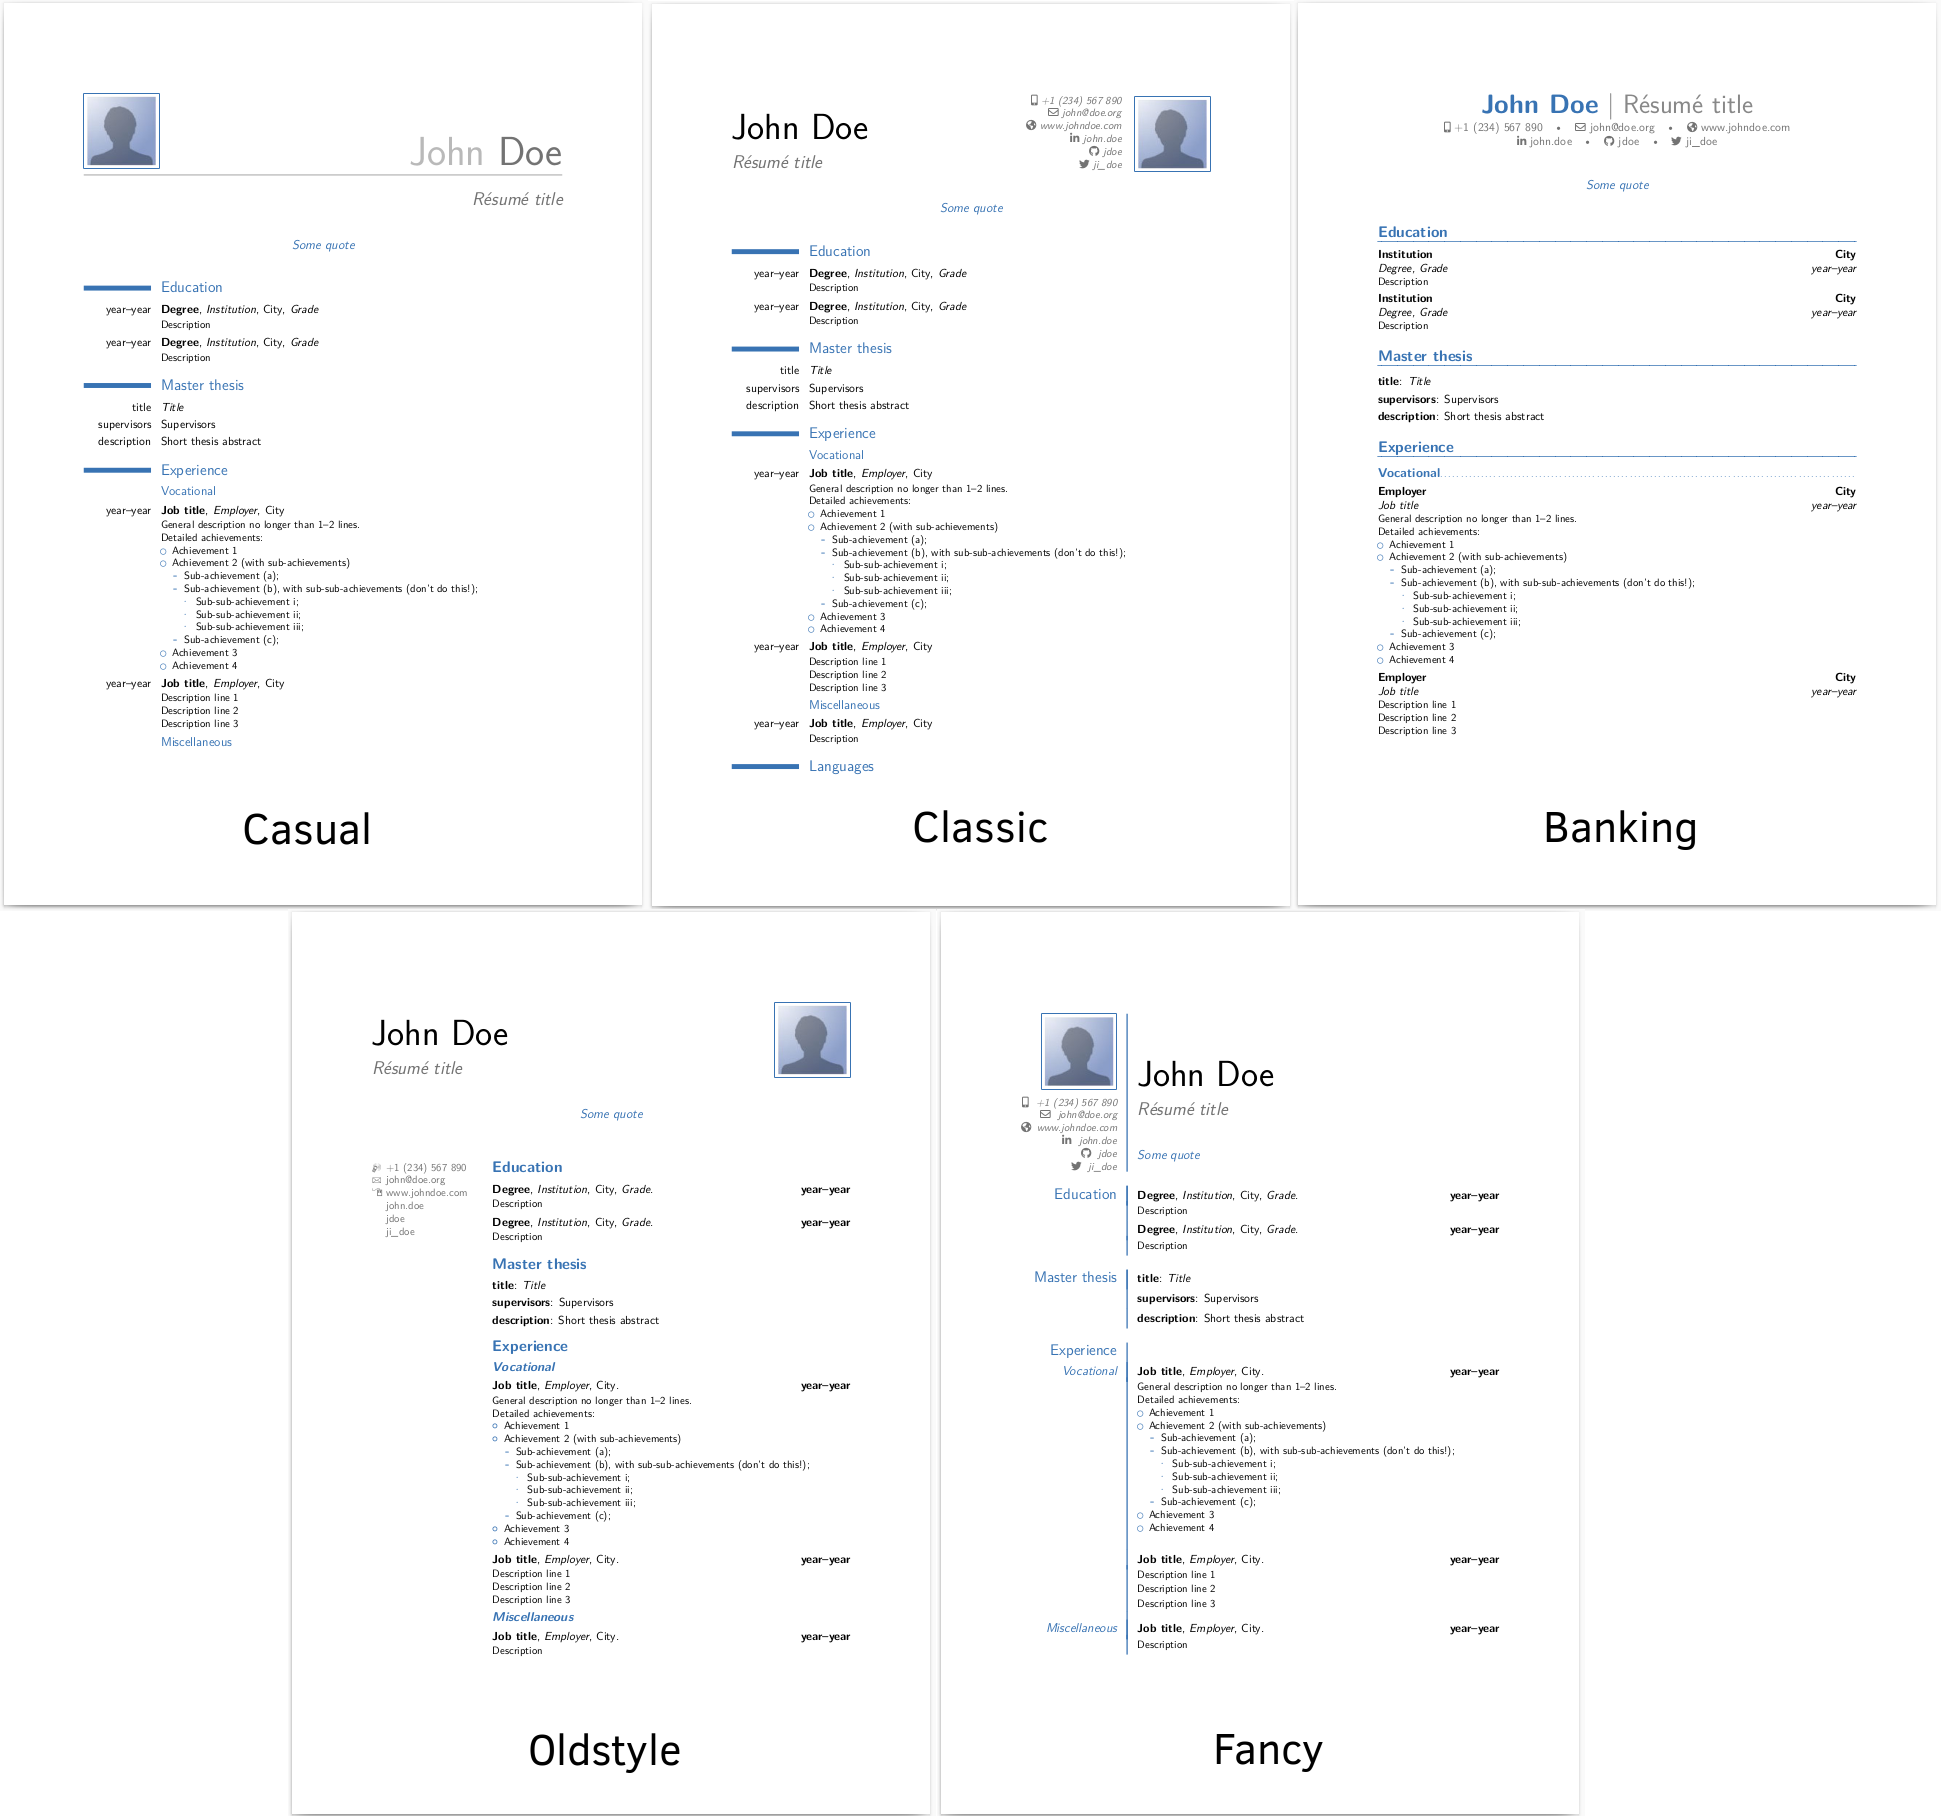
First it’s worth playing around with the different themes. Try switching between “casual”, “classic”, “banking”, “oldstyle” and “fancy”.
It’s worth reading the comments which explain a lot about how to customise ModernCV. You can also learn more about LaTeX format itself on Overleaf or on freecodecamp.org.
Tips and tricks
I’ve now finished my CV (for now), and I ended up doing a fair bit of customisation to do so. Here’s some of what I learned.
Customising in general
In general, the code behind ModernCV is very involved. It’s probably not worth reaching in and customising the bits that aren’t intended to be customised.
Special characters
All special characters need escaping in LaTeX, or they will break the build. The most common ones that tripped me up are & and #. These need escaping (\$ and \#) every time you want to use them.
Changing margins
I personally find the margins around the content to be too large. It reduces how much text you can fit on a single page.
Margins can be changed within the \usepackage[scale=0.75]{geometry} line. That number represents the amount of you page you want to dedicate to the text (0.75 by default), so to reduce the margins, change the number towards 1. I personally chose 0.85.
If you further want to increase the amount of text per page, you could change the text size in the overall document with the \documentclass[11pt,a4paper,sans]{moderncv} line. However, I decided 11pt was just about right for me.
Adding plain paragraphs
My CV has 3 paragraphs of introduction just below the header, before the first section. For a single paragraph, you can simply write this text directly under the title:
\makecvtitle

Lorem ipsum dolor set amet

\section{Experience}
However, if you want to add multiple paragraphs they will, by default, have no vertical space in between them, which doesn’t look great.
You can add whitespace in LaTeX in various ways (e.g. \hspace{1cm}), but the method I chose was to change the \parskip size (which ModernCV has set to 0 for its own formatting reasons):
\makecvtitle

\setlength{\parskip}{6pt}  % Change paragraph spacing for the following text

Paragraph one

Paragraph two

Paragraph three

\setlength{\parskip}{0pt}  % Change it back, for the rest of the document

\section{Experience}
Highlighting links
Links can be created in the document using the standard LaTeX \href command. However, these aren’t highlighted at all by default in ModernCV, making it very hard to know which links can be clicked. There are various ways to add colours, underlines and other styling to links. I played around with these a lot. Personally the solution I thought was most elegant was to add a light grey underline to all links. I achieved that by adding the following code somewhere above the \begin{document} line in my .tex file:
% Add light grey underline to links
\usepackage{hyperref,soul}
\setulcolor{lightgray}
\let\oldhref\href
\renewcommand{\href}[2]{\oldhref{#1}{\hrefstyle{#2}}}
\newcommand{\hrefstyle}[1]{\ul{\mbox{#1}}}
Switching headers
The top-level theme files are fairly simple to change. These are defined in the moderncvstyle*.sty files (e.g. moderncvstylecasual.sty). You can try mixing and matching the different headers (e.g. \moderncvhead[\moderncvstyleheadoptions]{2}, around line 54) and footers, and switching them from left to right alignment (\ExecuteOptions{right,symbols}, around line 26). For example, others have tried mixing the “classic” style with the “banking” header.